Glitch + GitHub
If you’re tackling this content in order, you should have already read the introduction to Glitch and GitHub and created accounts for both.
Now, you’ll learn how to create projects on Glitch and connect them with GitHub. Doing this is helpful for a few reasons:
- It creates another copy of your code on GitHub (think of it as a backup of what’s on Glitch).
- It provides you with experience using git commands and GitHub, both of which are commonly used in modern web development.
Note that it’s entirely possible to use Glitch without GitHub and to add non-Glitch projects to GitHub; they’re not necessary for each other, but they are complimentary. As part of this course, you may create Glitch projects just for your own experimentation and those will not need to be shared with GitHub. However, every graded project will be on both Glitch and GitHub so I can easily review and comment on your code.
👉🏻 Please note that this will go most smoothly if you have an uninterrupted 30 minutes to work through these steps from start to finish.
Step 1: Create a new repository
👀 I have also created a step-by-step video (2mins) of this process.
Starting on GitHub, log into your account, and then create a new repository following these directions.
- Name your repo project1 with no spaces.
- Make your repo public.
- Don’t check any of the extra checkboxes.
See this screenshot for a full view of the settings to create the new repo:
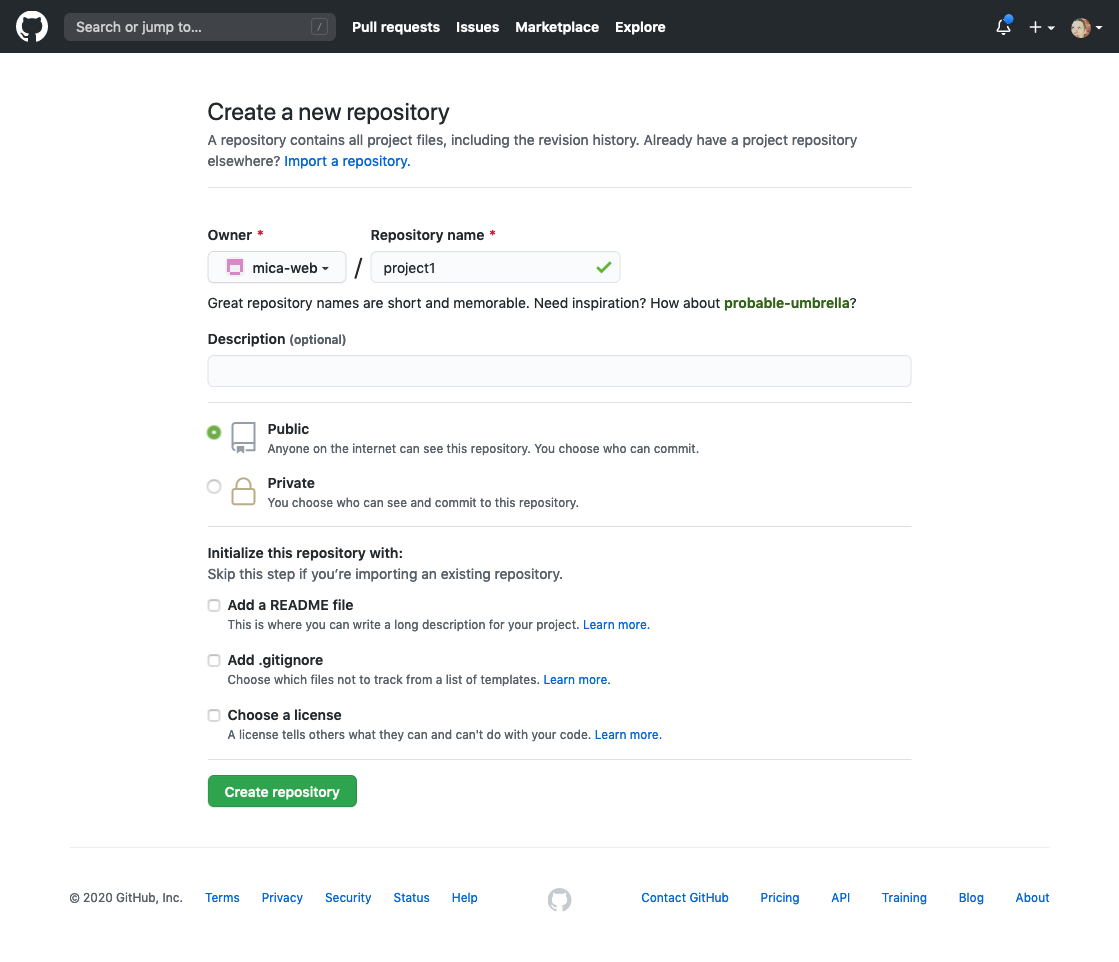
When you’ve correctly entered everything, click the Create repository button. You’ll end up with a page full of instructions; leave this page open for now, and you’ll come back to it later.
Step 2: Remix a project on Glitch
👀 I have also created a step-by-step video (2mins) of this process. The video does not cover all the info in the text below, though, so you should still read through the instructions.
Next, open a new tab or browser and go to Glitch and log into your account. Open up my starter project and remix the project:
As you can see above, the original project is named mica-web-starter and then a copy is created with the dynamically generated name south-shell-shoemaker. In your remix, you can rename this project to something more relevant or keep the creative name Glitch has assigned.
Both GitHub and Glitch have the concept of taking existing work and creating your own copy or version; on GitHub, this is called forking Following and reading this link is optional.✳️ and on Glitch it’s called remixing.Following and reading this link is optional.✳️ As you can see in the above screen capture, you can copy your own work as well as other people’s.
Now you have a project on Glitch and a repo on GitHub and are ready to connect them both.
Open up VS Code and access the Command Palette (View > Command Palette), then type “Glitch” and select Glitch: Show Commands. This will open up a new menu and you should select Open Project. Then select the project you just created; those files will now be visible and editable inside of VS Code.
Step 3: Create SSH authentication
👀 I have also created a step-by-step video (5mins) of this process. The video does not cover all the info in the text below, though, so you should still read through the instructions.
The next steps will involve using the command line. If you haven’t used the command line or console before, I’ve written a short introduction to the command line that you should review first.
Open up the Command Palette again and again type “Glitch.” This time, select Glitch: Console. This will open up your console view in VS Code.
In the rest of these directions, whenever I use the word “console,” I specifically mean the Glitch console in VS Code.
In the console, type ssh-keygen and press Enter.
Pressing Enter in the console is what runs a command. It’s always a good idea to slow down and check what you’ve typed before pressing Enter.
After you press Enter, you’ll get a series of prompts in the console. You should press Enter through each of them and don’t have to add any additional information.
This screenshot shows the prompts you should see and the beginning of the success message you’ll see:
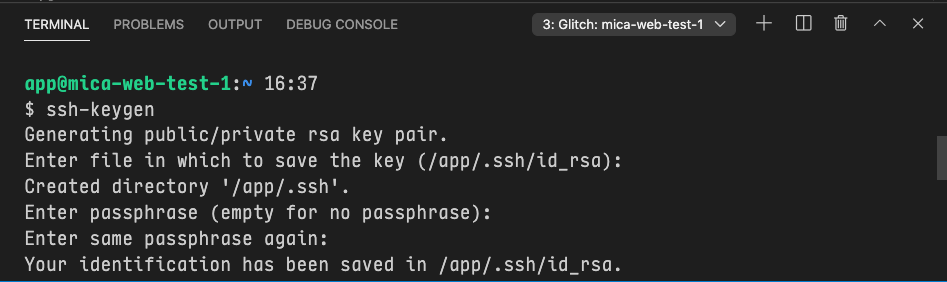
You have just created an SSH key pair which will allow your Glitch project and your GitHub repo to pass information back and forth without passwords.
If you’re interested in more detail about this, you can read about public key authentication.Following and reading this link is optional.✳️
Now you want to take the info from your public key and share it with GitHub. To do this, type cat .ssh/id_rsa.pub in the console and press Enter.
The cat command reads the file you name (in this case, the id_rsa.pub file in your newly created .ssh directory) and prints out the file contents to the console.
Highlight and copy the key that is displayed in the console; it should start with ssh-rsa.
Now, open a new browser window and go to your GitHub settings.
This link takes you directly to the page, but you can always get there yourself by clicking your profile photo in the upper-right corner of any page, then clicking Settings. Then, in the user settings sidebar, click SSH and GPG keys.
Click the button to add New SSH key and name the key “Push from Glitch demo”. Paste in the public key code you copied from the console and then click Add SSH key. (You may be prompted to enter your GitHub password at this point.)
Want to see detailed screenshots of the this process? View this walkthrough from the GitHub docs.Following and reading this link is optional.✳️
Because an SSH key is a form of access to your account, you will also receive an email from GitHub alerting you to this change to your settings.
Now you have a private and public key on Glitch and have added your public key to GitHub. Let’s confirm with Glitch that all has gone according to plan.
Back in VS Code, type ssh -T git@github.com in the console and press Enter.
This attempts to open an SSH connection to GitHub. You may see a warning that the authenticity of the host can’t be established followed by a prompt asking you if you still want to connect.
If the fingerprint is either:
SHA256:nThbg6kXUpJWGl7E1IGOCspRomTxdCARLviKw6E5SY816:27:ac:a5:76:28:2d:36:63:1b:56:4d:eb:df:a6:48
Then you can type “yes” and press Enter. (You can see and verify this information in the GitHub docs.)
At this point, you should see a message in the console with your username, like so:
Hi angeliquejw! You’ve successfully authenticated, but GitHub does not provide shell access.
🎉
⚠️ If you see anything else at this point, please copy the full message from your console and send it to me via DM on Slack, and we’ll troubleshoot. You will not be able to continue with these instructions until this is resolved.
Step 4: Connect Glitch to GitHub
👀 I have also created a step-by-step video (5mins) of this process. The video does not cover all the info in the text below, though, so you should still read through the instructions.
So, we’ve now shown that GitHub and Glitch can talk to each other. Your Glitch project is already using git by default – you didn’t have to do anything extra to set this up – and we can prove that by typing git status in the console.
You should see a response like so:
On branch master
nothing to commit, working directory clean
git status is our way of asking git to tell us some of the information and detail known about our work.
Way back at the end of step one, you created your GitHub repo and got a screen full of instructions. Now you actually need to revisit that page and use some of the info there.
Under the heading Quick setup is an address for your repo; it should start with git@github.com and end with .git. If it does not look like this, you may need to click the small SSH button to update the address. Once you see the correct address, copy this full address.
For me, this address is git@github.com:mica-web/mica-web-demo.git, but your address will be different because the bit immediately after the colon (:) will be your GitHub username.

Now, back in VS Code, type git remote add gh your-address-here in the console, replacing the your-address-here with the address you copied from GitHub. As an example, here’s what the full command looks like for me:
git remote add gh git@github.com:mica-web/mica-web-demo.git
When you’ve got the full command right, press Enter.
If you want to know more, I’ve broken this command down:
gitmeans this is a git command; all git commands start this way (remembergit statusfrom earlier?), so you’ll be typing this a lotremoteis the word git uses for a location where your code is storedaddis the action; this means we’re adding a new remoteghis the name we’re giving the remote (short for GitHub in this case)- the next bit is the address for the remote we’re adding
git remote add is the bit that is always consistent; the next two bits are customized based on what you’re adding. This is like creating an entry in an address book; we’ve added an entry named gh and told git where that entry is located.
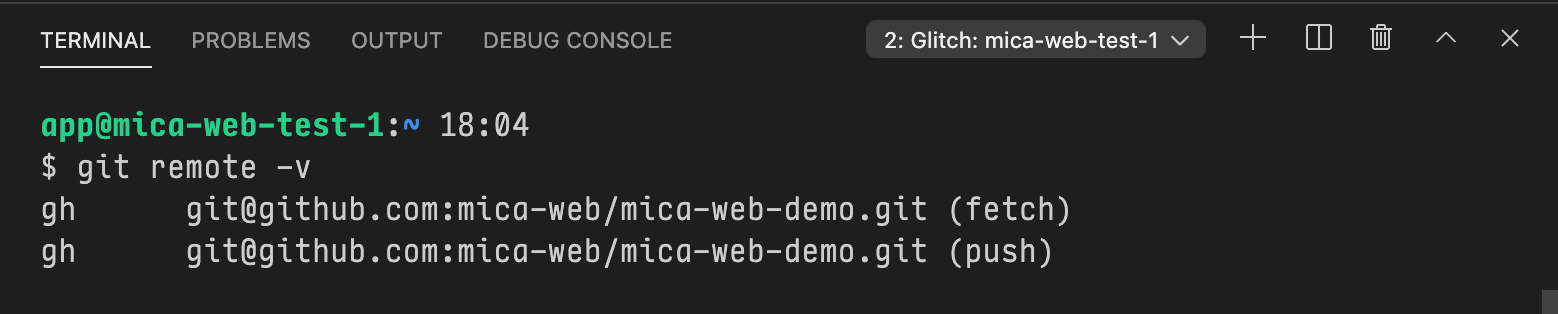
To verify that your new remote is in place, type git remote -v in the console and press Enter.
You should see your address listed twice with the name gh.
🎉
The two actions you see to the right in the parentheses of your address – fetch and push – reference the two main ways of sharing information in git.
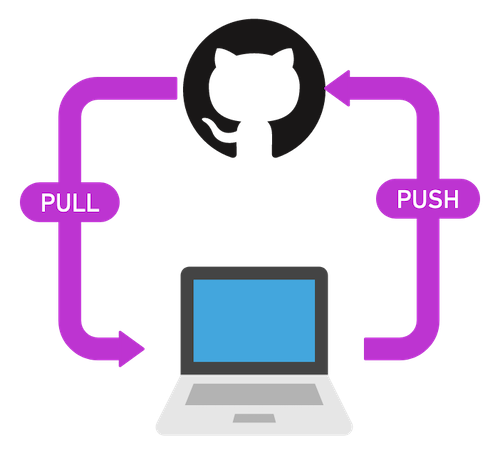
- fetching or pulling references bringing code from your repo into your working project
- pushing is going in the other direction – moving code from your working project into your repo
This was explained in more detail in Git and GitHub in Plain English.
Step 5: Push Glitch code to GitHub
Now the big finale, the thing we’ve been working toward all through these steps: Let’s get your code from Glitch to GitHub.
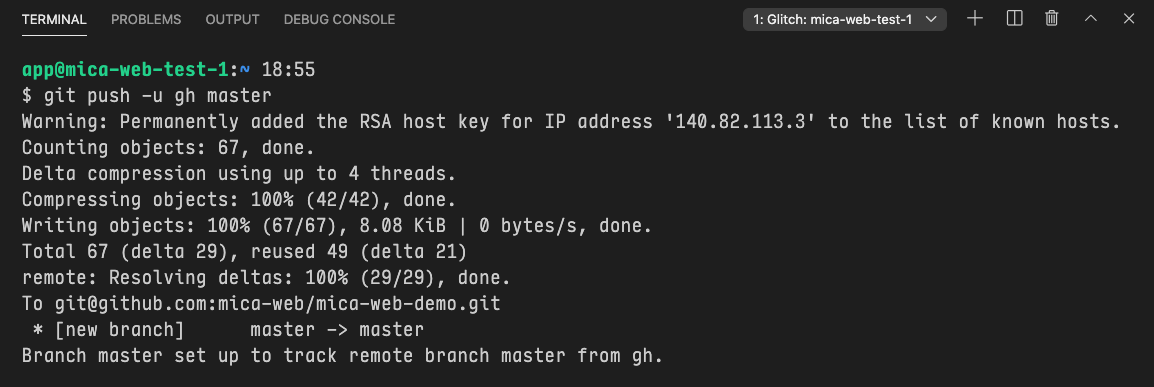
In VS Code, type git push -u gh master in the console and press Enter.
Your console will display a bunch of info as it takes the files from Glitch and copies them over to GitHub.
If you go back to your browser at the GitHub tab, refresh the page and you should now see the files from Glitch.
🎉
Back in VS Code, if you type git status in the console and press Enter, you should see some new information:
On branch master
Your branch is up-to-date with ‘gh/master’.
nothing to commit, working directory clean
That second line is telling you that Glitch and GitHub are in sync – which is exactly what we want to see.
Step 6: Your first git commit
In VS Code with the demo project open, open the file named README.md.
At the top of that file, create a new line and add some text.
This text can be anything, even just the word “testing.” Just remember that we’re going to push this change to GitHub, so it shouldn’t be private or embarrassing. 🙈
Now, in the console, if you type git status, you’ll see there are changes tracked by git:
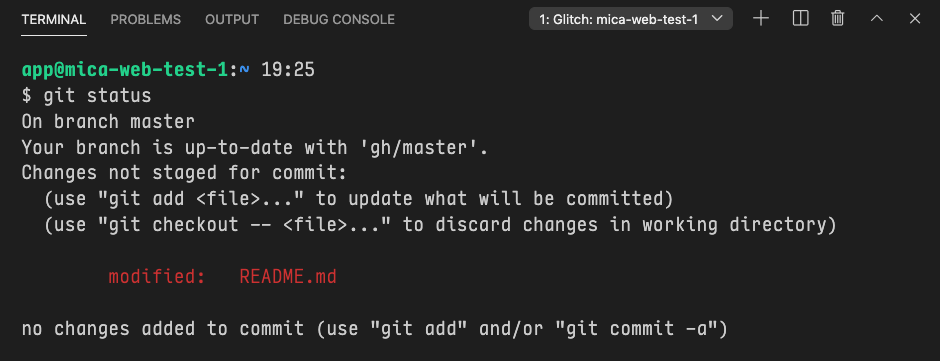
Also, git is providing some helpful tips about the commands you can use going forward. What we want to do is stage the changes to the README.md file and commit them.
First, type git add README.md in the console and press Enter.
Then, type git status in the console again to see how this has changed things.
While a git commit can include multiple files, in this instance we’re just changing one file so we don’t need to git add anything else.
In the console, type git commit -m "My first commit" (make sure to include the quote marks) and press Enter.
git commitsays you’re making a commit- the
-mmeans you’re including a message with your commit (which you always want to do) - the bit in quotes is your commit message and can be customized
Over the course of the semester, we’ll talk more in depth about what makes a good commit message, but, for now, “My first commit” is good enough 👍🏻
Once more, type git status into the console. You should now see a notification:
Your branch is ahead of ‘gh/master’ by 1 commit.
Using the git push command in the console will then move those changes up to GitHub and another git status will show that things are back in sync. If you go to your project on Glitch and your repo on GitHub, both places should now show the changes you made to your README.md file.

If it’s helpful, you can also watch me go through the process of editing files in VS Code, committing my changes and pushing those changes up to GitHub.
That’s it! You’ll be using this demo project and repo throughout the course to practice things, and you’ll repeat this process to create new projects and repos for each of your graded projects. But those are tasks for future-you; right now, you should get up, stretch and take a break. 😀